
Installation and Licensing
This section covers how to install Smart Print Controller (SPC) and activate the license.
1. Install Smart Print Controller
Run the installer:
SpcSetup.exe
Follow the installation wizard to complete setup.
Default installation paths
-
SPC application:
C:\Program Files\Hybrid Software\Smart Print Controller -
Harlequin Direct:
C:\SPCHD
These paths may be relevant when configuring integrations or troubleshooting.
If your deployment uses custom locations, ensure downstream configuration is updated accordingly.
2. Launch SPC
After installation, you can start SPC using:
-
Start Menu → Hybrid Software → Smart Print Controller
-
Or directly:
spc.exe(from the installation directory)
3. Activate the license
When SPC is launched for the first time, the Product Activation window is displayed.
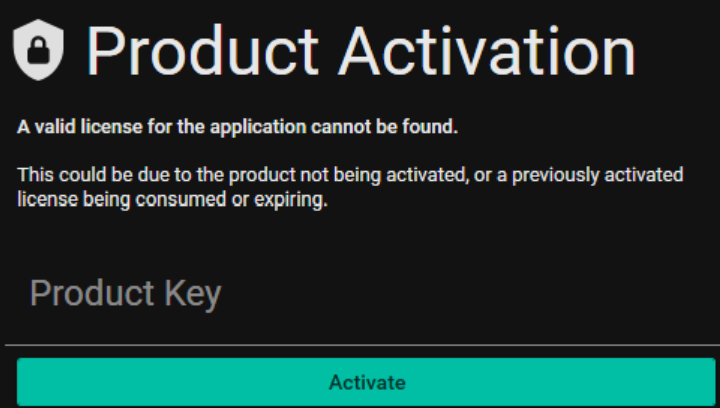
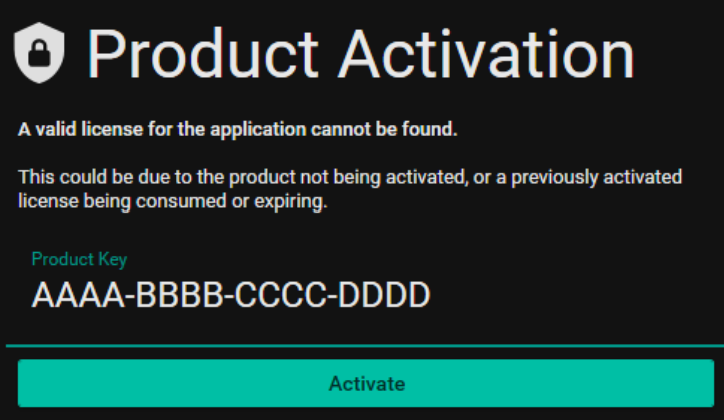
To activate:
-
Enter the product key provided by your Helix representative
-
Ensure the system has an active Internet connection
-
Complete the activation process
4. Verify activation
After successful activation:
-
SPC launches to the main application interface
-
No further activation prompts are shown on start-up
License behaviour
-
The product key is persisted on the system after activation
-
Subsequent upgrades of SPC on the same machine:
-
Do not require reactivation
-
Automatically reuse the existing license
-
Notes and constraints
-
Internet access is required for initial activation
-
If activation fails:
-
Verify network connectivity
-
Confirm the product key is valid
-
-
For offline or managed deployment scenarios, contact Helix support
After activation using your product key, any newer versions of the application that you install will use that key and not require additional activation.