
These steps will print to a local Rip Server (127.0.0.1), outputting to a Meteor Sim file.
Load the Meteor Device Configuration
-
In the Engineer Pane, click 'Load Device....'
-
Select 'Meteor - KCMY.sdc'If the file is not visible, navigate to C:\ProgramData\Smart Print Controller\DeviceConfigs
-
Verify that the RIP Direct configuration is set to 'RIPServer_Meteor'
-
Click 'Apply' to send the setup to the RIP serverAt this point the Network Icon in the top right of SPC will be Green
If you see a red network icon, please see the troubleshooting guide before continuing.
Print a file to MetSim
-
Drag a sample PDF (e.g. CambridgeGold.pdf from the SamplePDF.zip) into the Waiting Queue.
-
Move the file from the Waiting Queue to the Printing Queue
-
Press the Start button
-
After a short time a popup will appear
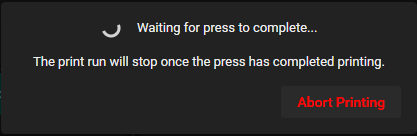
This dialog is to notify the user that the print run has not completed because a ProductDetect signal has not been sent to the Meteor Subsystem. -
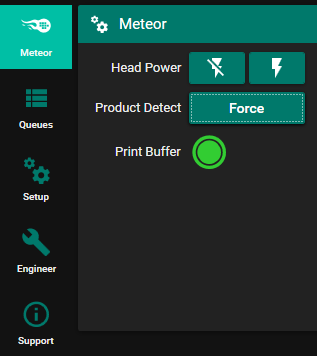
To send a Product Detect, and allow the print run to complete, change to the Meteor Pane and click the Product Detect 'Force' button.
-
There will now be a file in C:\SimFiles called MeteorSim1.sim
Double click this to open it in SimPrint and view the output file.